And we know that all things work together for good to them that love God,
to them who are the called according to his purpose. . Romans 8:28

truth

For the Lord himself shall descend from heaven with a shout,
with the voice of the archangel, and with the trump of God:
and the dead in Christ shall rise first:
Then we which are alive and remain shall be caught up together with them in the clouds, to meet the Lord in the air:
and so shall we ever be with the Lord. 1 Thessalonians 4:16,17 / KJV
Jesus is our soon coming King
James 5:8 Be ye also patient; stablish your hearts: for the coming of the Lord draweth nigh."
Showing posts with label tutorial. Show all posts

Friday, October 19, 2012

Popcorn!

I made some popcorn trim for a few cards. You can see the Grace and Daniel one HERE 
 Here is a close up of the popcorn on that card:


and stop by tomorrow to see the second card in the FBD October Rubber Release and Blog Hop!

                                 (( I will edit tomorrows post with a link to that card as well ))

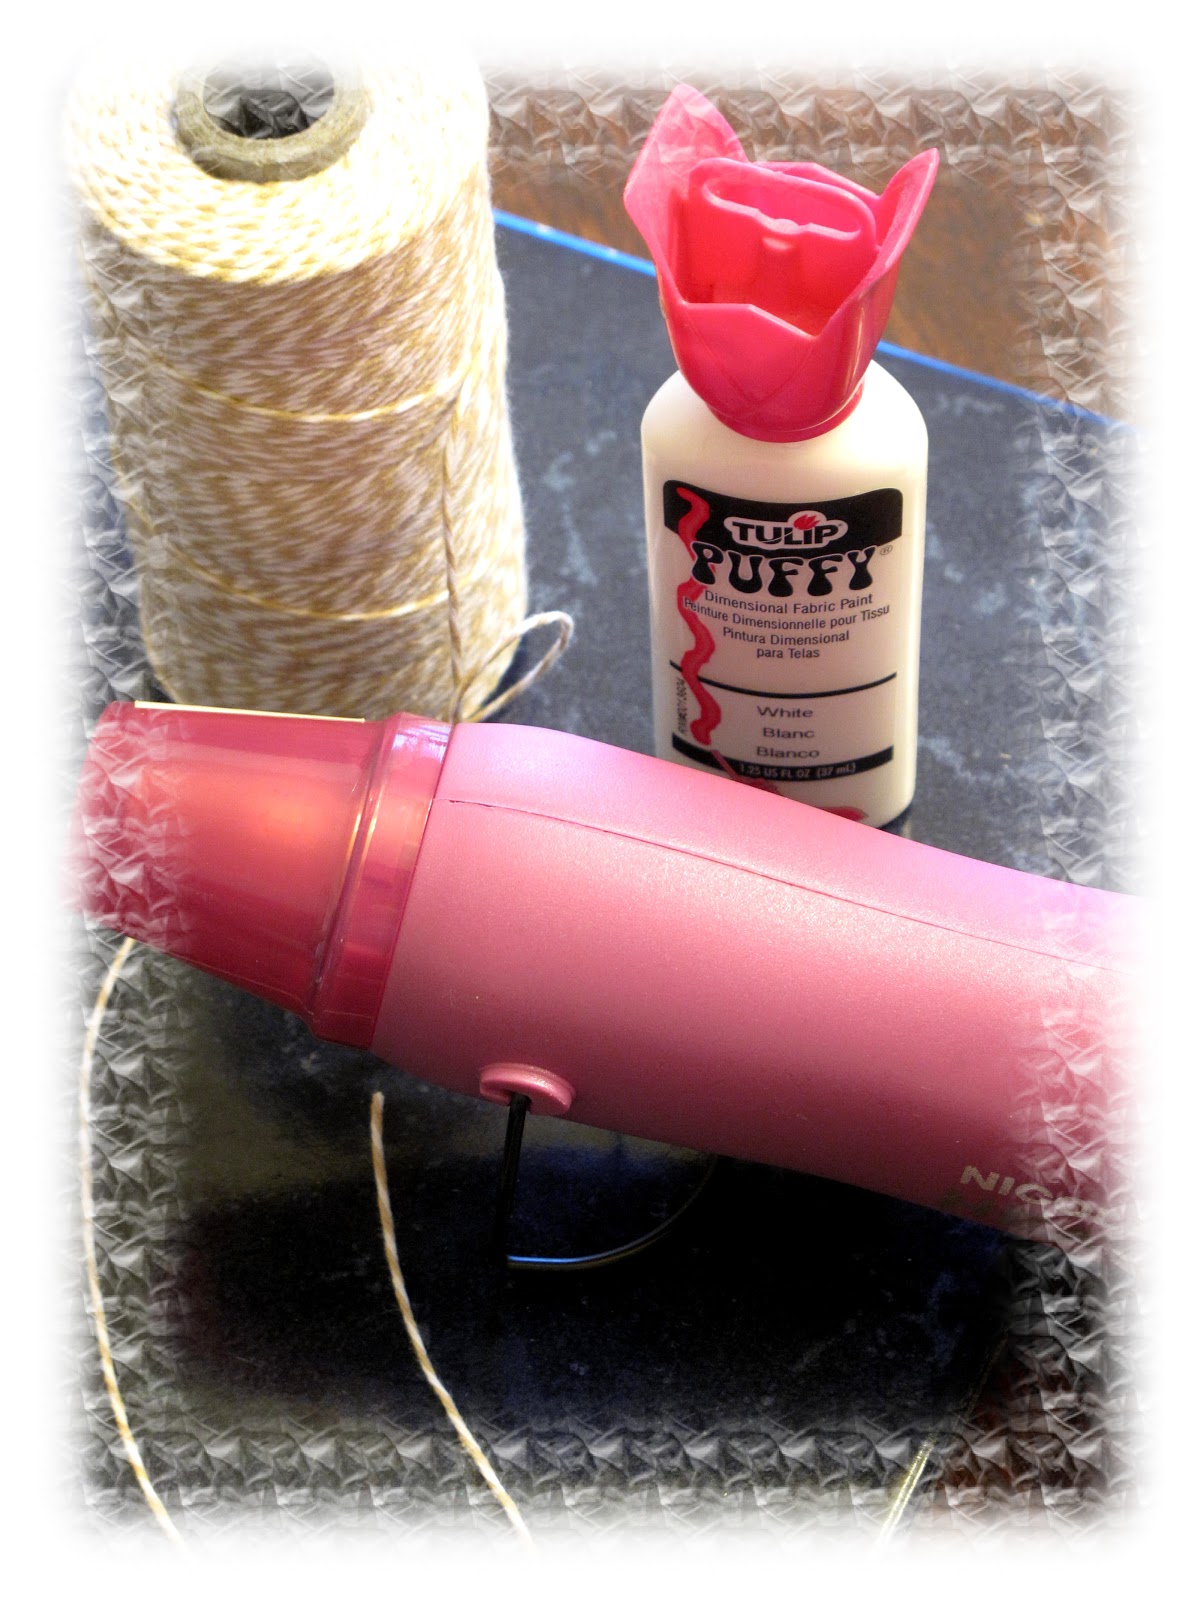
 Here is simply how it was created. 
I used twinery twine, tulip puffy paint and a heat gun.
 Lay the twine on a heat proof surface such as a ceramic tile as I did. 
Then place dots of paint across the twine as long as you want your popcorn string to be.
 Heat your 'popcorn' carefully until it puffs up. I like to leave mine on a little longer to sort
of 'brown' it to make it look more realistic, but be careful not to BURN it. 

 See the hint of brown in that piece?
They look pretty.. and puffy, but not really like popcorn. 
To make that magic happen, carefully flip over your string.
See - it is still wet underneath! Use your heat gun again to heat the under side.
This is how you will get the popcorn pieces to look like the real deal!
Here is a peak for tomorrows hop post:

 
I hope you liked my simple little tutorial. 
Have fun creating!

Heather

Monday, July 30, 2012

Beach Bums + Fake Washi Tape

Good...er ...  afternoon.
It has been rainy and messy the past few days.. which is fine. 
We need the rain and I really wanted an excuse to stay home today. 
I have had a super busy weekend leaving me little time to create. 
That is why you are getting this post SUPER LATE and I hope you will forgive me for that. 

This card features the Fresh Brewed Designs rubber stamp: Beach Bums. 
She is sassy and fun and loves summertime (when it is not raining that is :) 
I created this card using papertrey inc paper (orange and teal) prismacolor markers and glossy accents.
The gradient bright  paper strip was created using ink it up inks in yellow and orange.
 I used a blender pin to smear them together.
 
I have been seeing the washi tape (like a printed masking tape)  on so many projects as well as in some really fun packages my friend has sent me recently. I have not been able to purchase any of my own, so I looked up tutorials. People have used various things from paper to tissue paper for theirs. I like the see through quality the washi tape has... so the paper is too thick for me.. and I did not have any tissue paper that was thin .... so I found the next best thing! A pack of printed napkins from my daughters birthday part that had never been opened. I thought the dots resembled bubbles well enough.
 Here is what I did to create my washi tape:

First, since this napkin was two ply, I  removed the white napkin underneath


Next I laid the napkin flat, print side down. I took strips of double sided tape, 
cut them to the length I wanted, and laid them carefully over the print I desired my tape to be. 

After that I carefully cut around the tape with my fussy cutting scissors and voila!
 My own (fake) washi tape.


The real stuff is much prettier, no doubt, but this will do in a pinch! :) 


I want remind you know that we are having a DIGI RELEASE THIS WEDNESDAY!
We are also having a DIGI RELEASE PARTY on facebook. 
If you want to attend, join our group HERE then click on the events tab to join our party.
One person will be going home with 5 NEW DIGIS!!! Hope to see you there!


Challenges for this card include
Designed to Color: Washi Tape
Sentimental Sundays Sketch: Sketch (check) inked area (yellow and orange blended paper using inks and a blender pen) (check) FORGOT THE SENTIMENT and  cant enter to win lol! 
Simply Create Too - 2W - Week 2, Use it Two Times (at least)    (embossing folder) 
Totally Papercrafts – Orange & Yellow

Sunday, July 15, 2012

Fresh Brewed Designs Blog Hop Day 2

I was so excited to hop and see all of the fabulous creations myself 
(the team keep their cards a secret from me until hop day so I am surprised too ;)

Today I am sharing a card I created using the NEW released Spa Girl
*renamed from Some Things are Better Rich*

In resizing her, I realize now that I did not do such a fantastic job of it
She is really not THAT much smaller than the original size... 
so I am going to focus more on versatility today rather than size.
Here we go!


was fussy cut and paper pieced on this card. 
I gently placed her on top of a SWEETHEART CUPCAKE DIGI from the
FBD shop, printed and cut out in two different sizes.


This card is the same layout as the first, 
but you can see that she is a tad smaller here

Here they are side by side.
and here is a not so hot pic of them overlapped before 
creating the cards with them ..

now  I have to tell you that I LOVE how you can emboss nesties when you use them... 
however, I have a cricut and have had it forever and the poor thing is hardly used. 
I will NOT purchase a circle nestie even though I want one because I can cut circles ALL DAY 
with my cricut. SO here is how you can get the embossed edge if you do the same thing *you do NOT have to have a light box, but it does help*
You do not have to have a cricut either, just the ability to cut two circles :)

You will need to cut out your circles making one 
1/4 inch  larger (or smaller :D) than the other. 

Next take your larger circle, overlap it on the smaller circle cut out and 
emboss it by tracing around the edge with a stylus. Depending on the
thickness of your cardstock, you may need to cut it out twice and 
double up the base paper for your stencil. Easy right? 

Thank you for stopping by today!!!! 


Have a blessed day!!! 
Heather 
 
challenges for these cards include
Cupcake inspirations: Photo insp.  
I Heart 2 Stamp monthly sketch

Saturday, January 21, 2012

Make Me Something Pretty ... Embarassing!!! ;D


OK ... SOOooOOooooo
I am back today with a tutorial
on how to make the flower you saw on
<<<< this card HERE


As you can see above, I stayed with the whole Paris / Eiffel Tower theme with this card. I had the card and image ready and thought the flower would be pretty with her too :D I almost took some watered down food coloring and made it pink... but ran out of time.. so here ya go! Coffee Stained and shabby chic.

I created this card using the Eat Sleep Stamp Sketch >> HERE << where my card was featured last week. Tracy suggested I make a tutorial and I did not want to let her down, so you get a video tutorial (THAT IS TERRIBLE! just sayin' HA!) and a picture tutorial because the vid is terrible (just sayin') :D

The image is one of the FBD New released digis called Gianna Dreams of  Paris (yes, in the vid I forgot the name of the image ... der! and I made terrible faces ... lol) ANYWAY - I had a lot of fun making this card and hope that you will try to make one of these flowers as well. If you do, please come back and share it with me! I would love to see it!!! (PROOF MY TUT WORKED YOU SEE ;)! HA!)

THANK YOU for the sweet comments and inspiration Tracy! 
you are da bomb ;)
OK, I will be hiding in my craft room with the lights off while you watch the video :D hehehe!!! 
 

LOTS of HUGS and SMILES!
Heather

Challenges: Allsorts - 1E - #138 Needles & Pins, My Sheri Crafts  - New Things, Our Creative Corner -  Picture Inspiration*, Hotshot Crafts – Flowers, Inspire Me Fridays – Link Up Party, Eat Sleep Stamp - Sketch*,  Paper Play -"Ribbon Every Which Way, Creative Belli  fancy frames, Fab 'n' Funky - bingo*, Papercraft Star \photo insp* plus frame, Digital Tuesday - Romantic Card,
Cupcake Craftroom - - Anything Goes, Cupcake inspirations: Photo : Pink and brown, Six Sisters Link Up:

comment counter